Plastic injection molding refers to the injection of molten plastic at high pressure into a pre-designed template known as a mold. The molten plastic is then allowed to cool to form an object in the shape of the mold. This process is used to design a variety of utensils, packaging, toys, and many other objects.
As a product manufacturer, plastic injection molding may be of great benefit to your business. It could improve your production processes, output quality and even lower your operation costs. However, it would be helpful if you understood how it works to gauge whether it is applicable in your sector and how you can harness it. To that end, here is a definitive guide on injection molding design and other important basics of the process.
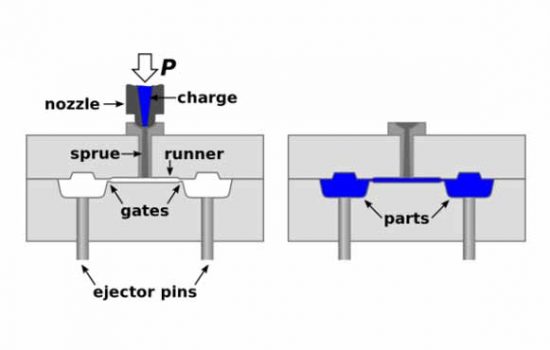
Source: Wikipedia
The injection plastic molding process is facilitated by a series of components. Each of them plays a unique and fundamental role to achieve the desired results. Here is a list of the main components you would encounter in injection plastic molding.
Injection machine – this machine is connected to a feeder on one end and a nozzle on the other. The feeder loads it with molten plastic which is then dispensed to the tooling through the nozzle. It has a pressure control mechanism to ensure that the molten plastic is injected at the right pressure.
The sprue – a sprue is a valve-like channel. It is placed right against the nozzle and held in place by bushings. It directs the molten plastic dispensed by the injection machine nozzle to the tooling system.
Runners – if the sprue is the tap think of the runners like piping. The molten plastic flows through them to get to the cavities of the mold. They create a more directed system of flow as opposed to the molten plastic flowing unevenly in any direction.
Note: in some tooling designs, the runner/sprue system can be part of the mold but in others, they are a detachable component.
The gate – the gate is the immediate opening leading into the cavity of the mold. It is often narrower than the runner and is specially designed to control the rate of flow and the amount of molten plastic that flows into the cavity.
Ejector pins- once the casting is formed, it has to be ejected from the tooling. This may require a bit of a nudge and, therefore, some tooling designs include ejector pins which can be used to gently push out the cast.
Now that you have a clear understanding of all the parts involved, let us delve into the molding design processes.
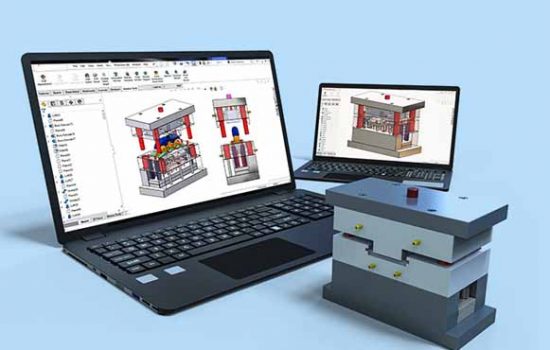
Injection molding design stages can be classified into two parts; designing the part and tooling. In this instance, ‘the part’ refers to the object or device you intend to produce using the injection molding process. For example, if you manufacture baby feeding bottles, they would be ‘the part’.
The tooling, on the other hand, is a metal template usually made of aluminum or steel. It is manufactured in the exact dimensions and design of the feeding bottles you wish to produce. As a result, when molten plastic is injected into the tooling, it cools to form the structure of the feeding bottle.
As a manufacturer it is likely that you have an in-house creative team that comes up with product design concepts. However, you would need to contract the services of a tooling manufacturer to design and forge the plastic injection mold for you. It is much cheaper than starting to create your own tooling department from scratch.
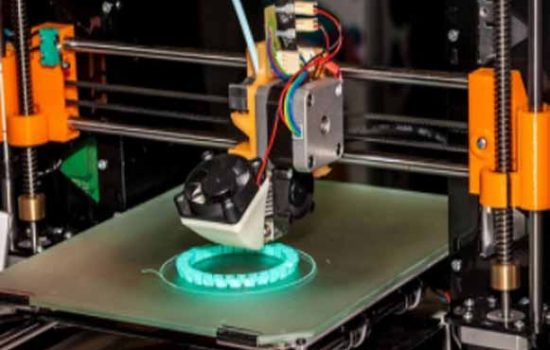
Designing the part begins with a sketch with a general creative concept of what it should look like. A prototype of the part would then be made using a 3D printer or a CNC machine. Engineers, as well as safety and utility experts, are tasked with inspecting and testing the viability of the part design before approving or modifying it. If there are modifications to be made, a fresh prototype of the corrected design will be made. This is done multiple times until a precise and viable model is achieved.
It is also at this stage that other design details like the draft angles and desired finish of the part are established. This is important because such details would influence the design of the mold and other particulars of the injection molding process like pressure and temperature. Let us explore them a bit further.
Source: www.3dhubs.com
When molten plastic is injected into a mold it cools and settles right against the walls of the mold. On one hand, this is the intended goal as the cooling and settling is how the cast is formed. However, this positioning also presents a problem when the mold is being ejected.
As the ejector pins push the part out of the mold, the sides of the part and the walls of the mold are in direct contact. The lack of space between them would result in friction and a pocket of trapped air because there is no room for air circulation. This causes 3 main problems:
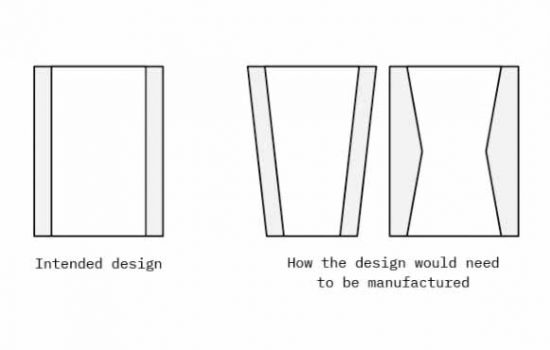
Draft angles are a design approach where the walls of the part are designed to slant by about a degree or so. This would mean that a part with a perpendicular design would have the edges of its vertical walls slope just slightly at a diagonal angle. The slope is so minimal that the normal eye may not catch it at first glance. In contrast, the mold would still have straight lines.
The goal of the draft angle is to create some space between the straight walls of the mold and the slightly sloped wall of the part. Such space greatly reduces friction and allows room for the circulation of air around the part. Consequently, during ejection, there would be no scratches or suction effect.

Surface finish and texture can be defined as how smooth, rough, glossy, or matte the exterior of an injection molding part is. While it is an end result, it needs to be pre-considered in the design phase so that the techniques to achieve it can be put in motion. It is equally important that it is factored in early because some finish or texture techniques may affect how the mold is designed.
Finish and texture can be aesthetic or functional. Aesthetic polishing or texturization are essential for making your product attractive to consumers or hiding blemishes that occur during production processes or product handling. Some aesthetic finishes like paint also help prevent wear and tear of some items. On the flip side, functional finishes and textures are important for:
The plastic injection molding industry classifies surface texture and finishes into 4 categories. They include:
Grade A- the highest standard of finishes achieved using diamond buffing paste. It delivers a very glossy look and smooth texture.
Grade B – it is implemented using sandpaper and is ideal for hiding or smoothing over blemishes. It delivers a semi-gloss and its textures can vary in smoothness from fine to textured(slightly rough).
Grade C – in this category grit stones are used instead of sandpaper. This produces a texture that is alike to that of Grade B but not as refined.
Grade D – this is a go-to category if you would like a plastic casting with patterns or a unique rough texture. It is achieved by pressure blasting the plastic casting with abrasive properties like sand.
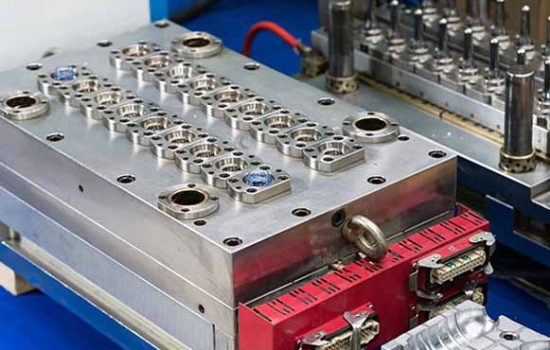
Tooling is also known as making the mold. Here the entire design process is based on the part to be produced. This is because the mold has to be identical to the shape and dimensions of the part to yield the right results. As such, the first step would be to sketch the mold and choose the material that will be used to make it. Aluminum or steel are the most popular options. Steel, in particular, is preferred for its durability and its firmness.
In most cases, tooling prototypes are not made. This is because prototypes are often made of resin which is very different from steel. They would not be an accurate representation of the actual mold. Instead, a sample of the mold design is forged using the chosen material. It is tested sometimes by trying to produce a sample injection mold. If it produces the right results, it is then made in sufficient quantities to support the production process. If it is inaccurate, design modifications are made and a whole new sample is forged.
The complexity of the tooling design process is the reason why it is so expensive. It requires lots of precision, skill, and expert machinery. It is also time-consuming as it can take up to 3 or 4 months to get the design completely right.
It is evident that the injection molding design process requires utmost care. Granted, you can always remake designs and even reuse materials through processes like re-grinding. Nonetheless, each retake comes at a cost and it can take up too much time. It is thus advisable to go into the process with some foresight to make your endeavors less challenging. Take into consideration crucial design factors such as:
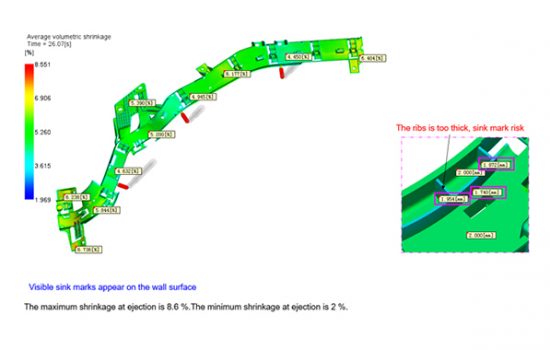
As molten plastic settles and comes in a mold, it has a natural tendency to shrink toward its centre of gravity. Despite best efforts to prevent it, some level of shrinkage is inevitable and it varies from one cast part to another. That said, it is crucial that the design team sets a limit on how far those variations can go.
The rule of thumb is that the allowable variations be within a range where the part can function optimally. This allowable range of variations are referred to as tolerances. They determine how well a part would work or if it would fit other parts it is to be joined with like covers, bottle tops, or seals. Your design team should certainly factor them into the design processes.
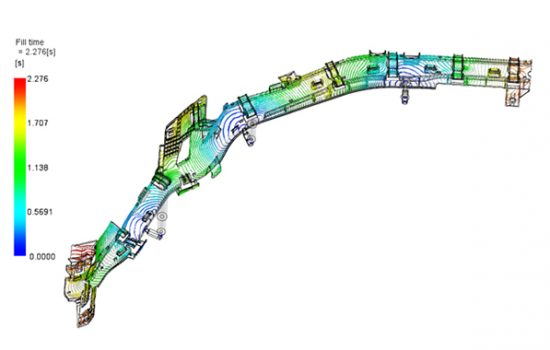
The size of your injection molding machinery will determine the size of production you can manufacture through this process. Large molds, for instance, require large machinery. Further, consider that injection molding large parts is quite expensive. It may be more cost-efficient to design large components with multiple parts that can be joined to make the whole. This would enable you to cast small parts separately and assemble them which could be faster and a bit cheaper.
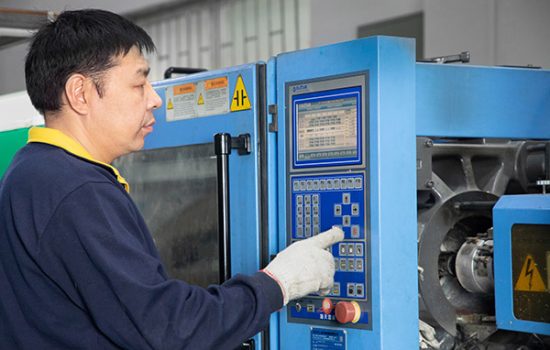
There are two main types of materials used in injection molding; thermoplastic and thermoset materials. Thermoplastic materials are mostly polymers which can be heated and melted again if their castings are inaccurate or have blemishes. Contrastingly, thermoset materials are epoxy resins which if heated a second time would burn and become degraded.
This distinction is important as both materials need to be uniquely processed. It would also guide you in choosing materials during the design phase. If your design is complex and likely to suffer errors, it would be safer to work with thermoplastic materials.
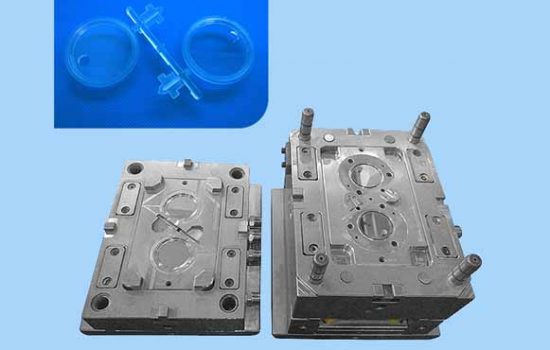
Every injection molding design presents unique design challenges. You may have very limited design options if you restrict yourself to the typical injection process. Instead, consider innovative approaches that offer more design flexibility and quality output.
Take for example that you are working to produce custom plastic parts that require distinct materials or colors. This may not be possible to properly achieve through the typical injection mold process. However, if you work with techniques like two shot molding you may easily be able to achieve your objective. Other injection molding techniques include:
Insert molding – it allows the joining of plastic with metals or other materials to improve the functionality of the part or as for design purposes
Clear plastic molding – this requires special machines and expertise to produce than opaque or translucent plastic molding designs. It is essential for producing objects like safety goggles or lab beakers.
Incorporating plastic injection molding into your production processes can be a positive turning for your brand. More so if you are looking to expand and produce in larger volumes. However, to truly reap its benefits, make an effort to engage the right tooling manufacturer and work closely with them to realize your design ambitions. True, outsourcing such services may seem costly or inconvenient but working with an expert may save you time and money as they have more experience in the inject molding craft.
+86-755-8524 1121
marketing@rydtooling.com
No. 2, HongKan 1st Road, YanChuan Community, YanLuo Street, BaoAn District, ShenZhen City, China. Post Code 518105.
Subscribe to our newsletter to get manufacturing news and updates!
